To learn more about them, take a look here:
http://wws.princeton.edu/news/AiWeiWeiExhibit2012/
They're zodiac animals, and there's a history about why AiWeiWei is interested in them.

Art, the Beautiful Metaphor, a gallery of original artworks by Liz Adams, and an ongoing work in progress, showing works in progress! My other blog is http://fieldfen.blogspot.com for opinion, commentary, books, food and movies All works by Liz Adams are copyright to her only, and may not be used in any form without explicit permission. Thank you for respecting my ownership.
Sunday, July 28, 2013
Saturday, July 27, 2013
Field and Fen Goes on a Field Trip
To see some cool design ideas, by gardeners along with nature as well as by ancient artisans, take a look here http://fieldfen.blogspot.com/2013/07/field-trip.html
I doubt if any copyright issues apply to the ancient work, and nature is always open to painters!
I really fancy studying the mosaic designs for beading purposes...
I doubt if any copyright issues apply to the ancient work, and nature is always open to painters!
I really fancy studying the mosaic designs for beading purposes...
Thursday, July 25, 2013
The Phoenix rises
This little needlepoint, about 4 x 4.5 inches, one view slightly bigger than the other, is from a chart in Monica Ferris' detective mystery Thai Die! it's of the Han Phoenix, a work on silk, one of the oldest of preserved Chinese embroideries, now in some museum in China, and for me it's an interval between goldwork and beading. I'm working it on 24 count canvas, three strands of floss. The background is three different greens in each set of three strands, to give a mossy sort of effect as a contrast with the plain unmixed colors of the bird. I did change the plumage on the body, though, because I liked this more variegated look.


The next beading AND goldwork at the same time piece, is a nice shell on rich brown fabric, part of the stash my friend unloaded on me, but I'm not doing what the kit says, which is wool crewel, but instead I'm going to figure out how to use goldwork and the seed beads in many shades of brown and gold I scored at the thrift store in the form of a necklace.
And last night, at a farewell-for-the-moment,we'll-see-you-again for an embroidery friend, she gave stash items of her own to any takers, and I was prevailed on to accept a giant, very heavy, beaded and embroidered Indian wallhanging. I need to put a fabric slot thing, correct name escapes me, on the back, to slide a dowel through, in order to hang it, at which I point I'll make a pic of it. It's amazing, and will dominate any space I put it in. Next trick is to find a big enough wall....
Monday, July 22, 2013
All Roads Lead to Stitching
Yesterday my neighbor, DIY friend in crime and craft, stopped by to give me a share in a giant basil plant she'd got at the market, and I duly took half of it to plant, gave her orange mint in return, and she departed. Meanwhile, a baby rabbit showed up and chowed down on the fallen basil leaves, amazingly sophisticated taste for one so young.
Then later, friend calls and says, this basil pesto you make, how do you do it, lemme write this down. So we discussed the various approaches to basil pesto, historical, folkloric, automotive, oh, wrong program, and she said right, I must find my blender.
Seems she has a brand new blender she put away carefully so as not to clutter up her counter, and can not now find. So she went up to the third floor (her version of my studio is the place you put Stuff Away). And still can't find it, so the pesto has to wait, or she has to borrow my blender.
But in the search she found a whole treasure trove of stitching related items, see pic, which she promptly offloaded onto me, on the grounds that I'll do something about them! which I will, since there's some lovely blank evenweave fabric there,black and white, and a giant hoop (possibly a quilting hoop) and a ton of unopened

kits. One of them she started years ago, and never finished, and I'm thinking of finishing this as a present for her, since she must have liked the design or she wouldn't have bought it.
So, interesting concatenation of events. Only two women could go from basil plants to stitching in three easy leaps.
Tuesday, July 16, 2013
So I couldn't wait and I printed it
Here's the as yet untitled piece, now scanned and printed onto habotai 10 momme silk (from Dharma Traders if you can't wait to try this at home). This is very gauzy light silk, 8.5 x 11 inches, and after I peeled it off the backing, it floated through the air and landed on Marigold's head, much to her suprise, since she hadn't planned on a wedding veil.
I really love this different iteration, with the accidental pickup of color, and the indentation of the hoop showing up surprisingly strongly, stuff that happens with techie things

And now I have to leave it alone until I decide what to do next. It might already be complete, and then again it might not. But I thought you'd like to see the next stage in this endless adventure.
I really love this different iteration, with the accidental pickup of color, and the indentation of the hoop showing up surprisingly strongly, stuff that happens with techie things
And now I have to leave it alone until I decide what to do next. It might already be complete, and then again it might not. But I thought you'd like to see the next stage in this endless adventure.
Title needed now.
My beaded and couched and generally stitched to within an inch of its life piece is done. It measures 3.5 x 4 inches. Any suggestions for a title? it reminds me a bit of an opened geode.
Now I plan to scan it and print it out on silk fabric and see what happens after that, in a different iteration. Here are two views, and as always, I'm open to votes on which way is up. It's years since I knew which way is up!

 .
.
Now I plan to scan it and print it out on silk fabric and see what happens after that, in a different iteration. Here are two views, and as always, I'm open to votes on which way is up. It's years since I knew which way is up!


Sunday, July 14, 2013
Latest gold and beadwork goes on (and the bead goes on!)

As soon as I took the pic I noticed passages that need to be rethought, this is what happens when you see it with the new eyes of the camera, very helpful.
Friday, July 12, 2013
Beading, the saga continues

Thursday, July 11, 2013
The Accidental Volunteer
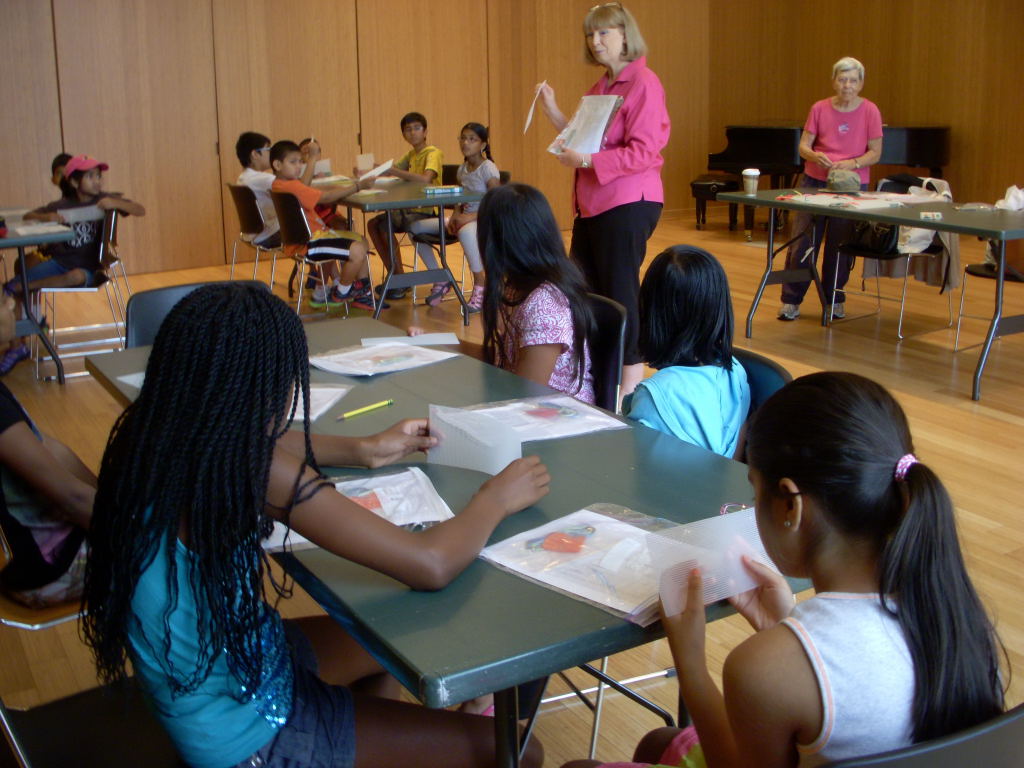
I went over to the library this morning to snap pix of the first morning of the summer embroidery for kids program,conducted by Ruth Levy and Ginny Hallock, Ruth a friend of many decades, Ginny a terrific teacher and generous volunteer one, too.
Took two pix for the Guild newsletter and the Township website, then my battery died. So Ruth, old friend, turns and says, well, you're here...and next thing I knew I was volunteering to help teach the group the beginnings of embroidery. And it looks as if I'll be back next week, since they are a bit short of teaching help.
Great fun, though, since I wasn't the main teacher, just an able bodied assistant. So here are Ginny addressing the masses -- this is about half the kids who signed up and didn't get into the picture -- and Ruth, who is perfectly happy to have you know she's in her ninth decade and still stitching. And teaching physical therapy, her main profession.

Sunday, July 7, 2013
The Temperature's Rising great weather for stitching indoors
Much as I don't like being indoors with all the doors and windows closed for the ac, it's been okay the last few days of intense heat, today heat advisories, index over 100 C., etc., since I've been watching movies (Poirot last evening) and stitching industriously.
I think this piece is finished. At least it looks that way to me at the moment. I had a couple of oval pearls in there before, which I removed and replaced with a trail of sequins with beads in the middle, I think a better choice. And there's a lot of metallic thread couching echoing the painted metallic lines and shapes.
Anyway, here are all four orientations for your viewing pleasure:


This piece will frame up to about 8 x 8 inches. I know, it looks a lot bigger in the pix, but my work often appears to be a lot bigger than it is in rl. I like this, since it avoids "cute" just because it's small. Doesn't mean trivial!
Now I'm off to read Fay Weldon while the next art adventure percolates.
Saturday, July 6, 2013
Tyvek, beads and stitching in progress
Here's where I am with the Tyvek stitching, the first one I made. It was originally a long piece, but I wasn't satisfied with the composition and split it into two parts. This is one of them! and you'll see three of the beaded motifs I worked on net applied here, two of them close enough to work as a unit. The fourth, bigger one, will find a home on the other piece, I think. Here you'll see the start of couching work, bringing in the black satin background into the design through the gaps in the painting.
I'm posting it both ways up, and would appreciate your take on which you like better. Or maybe you would like it with the beads lying horizontally? crowdsourcing your art, nothing like it!! anyway, let me know if you have an opinion on it.


This may be one difference between classic embroidery and freeform art: the first one generally knows exactly where it's going at the outset, and the second is constantly open to revision. I'm balanced precariously in both camps at times.
This piece will be in my exhibit next year, and I'll see how to render the idea in another medium. Or possibly find an existing work of mine and discover that it's already done. This happens, that I forget the general gist of other pieces and get a surprise.
Wednesday, July 3, 2013
Tyvek and silk dyes, stage one
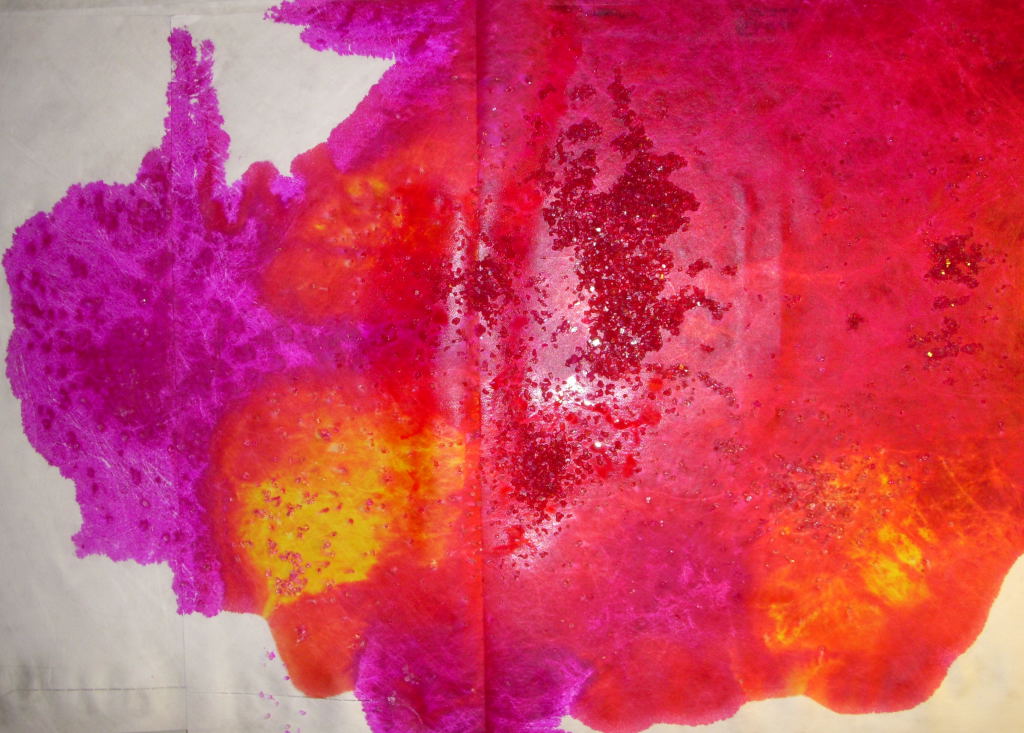
I've made a couple of trial pieces of Tyvek painted with silk dyes, with coarse silk salt sprinkled over to make starbursts. Here are a couple of pix, including detail closeups. You see the silk salt here and there -- this will be brushed off when the Tyvek is dry, leaving behind pale areas of starburst, very nice to stitch into.


The advantage to silk dyes is that they are easier to stitch through than acrylic, which is going to be tough to get the needle through, though it's pretty much indestructible in the process. Also the silk dyes run and blend very well. One is done in rose and jonquil, the other in French blue and jonquil, just to test out the theory.
They're drying now,and will be ironed between parchment to cause the wrinkling and shrinking. The crease you see here and there from the original envelope will vanish during that process. That's when I'll see if my ideas are working,as the final design starts to appear. Up till then it's chance working its own way.
Subscribe to:
Posts (Atom)